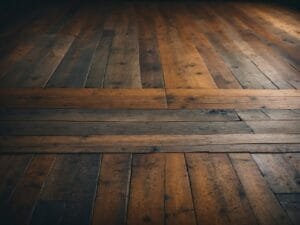
Step-by-Step Guide to Sanding Wooden Floors

Wooden Floor Redo – the sanding edition. Refinishing floors instead of replacing them is often the most affordable and sustainable choice.
The environmental impact depends on the materials and chemicals used and how they are disposed of. But that’s what eco-change is about: training yourself to consider and implement the environmental aspects.
It’s a Multi-Day Job but Rewarding
You don’t have to be afraid of it. There are a lot of moving parts, but none are overly technical. And it’s going to take time. If you don’t rush it and take care, you will get good results.
I’ve done this three times. by myself. There will be a fourth time. I plan on painting all my floors in a few weeks. Then, I can get more ventilation without freezing to death.
NB: Before you begin, make sure your floor can be sanded.
Sequence of Work: If you are renovating an entire room, it’s advisable to paint the walls before refinishing the floors. This approach prevents paint spills from damaging your new floors and allows for easier cleanup of any paint drips.

NB: If you don’t think you’ll ever use a tool again, rent it. Or borrow if you have relatives or neighbours who trust you – don’t betray that trust and start one of those Hatfield/McCoy type things.
Wooden Floor Redo – What you Need
Here’s a comprehensive list of tools and supplies for sanding a floor, It covers both essential and optional items:
Tools & Supplies
- Drum Sander with a continuous belt or sleeve. There’s less chance of making marks on the floor sanding large areas.
- Edge Sander. To reach corners and edges where the drum sander can’t.
- Handheld Orbital or Palm Sander. For fine detail work in tight spots.
- Shop vacuum. For dust removal between sanding passes.
- Hammer & Nail Set (Nail Punch). To countersink any exposed nails.
- Pry Bar & Pliers. Remove old staples and nails. Nail pullers with weighted slides that worked well for me on really stubborn nails..
Sanding Supplies
Sandpaper (in various grits). Buy enough. You can usually take any unused paper back when you return the machine. So check when you rent it.
1. Coarse (36-40 grit). For removing old finishes, paint, or scratches.
2. Medium (60-80 grit) For smoothing after coarse sanding.
3. Fine (100-120 grit). For final smoothing before finishing.
4. Dust Masks or respirators. To protect against fine dust.
5. Safety Glasses. For eye protection.
6. Ear Protection (Earplugs or Earmuffs). Sanders can be loud.
Optional Items
- Extension Cords (Heavy-Duty), If outlets aren’t nearby.
- Tack Cloth or Microfiber Cloth For wiping down dust before finishing.
- Wood Filler (Optional): If you need to fill gaps or deep scratches. If there are gaps between you can add a number of ways.
- Masking Tape or Painter’s Tape: To protect walls and trim.
- Knee Pads: If you’ll be doing kneeling
- Work Gloves: For handling rough surfaces.
- Strong Magnet.To check for hidden nails.
- Floor Buffer (Optional): For an extra smooth finish after sanding.
- Your favourite “Reward Snack”.
Preparation & Cleaning
Again. The better the prep, the better the finish.
- Clear the room of all furniture and fixtures.
- Seal doorways and vents with plastic sheeting to contain dust.
- Sweep and vacuum the floor to remove loose dirt and debris.
- Wear protective equipment, including a dust mask, safety goggles, and hearing protection.
Inspect and Repair:
Do a visual Inspection. Is there evidence that your floor has been sanded before?
Tools
You’ll need your hammer, punch, pullers, putty knife or scraper, magnet and flashlight. You are looking for protruding nails or staples.
Fix it immediately, or chalk mark a small area.
Fixing the Issues:
Critical!
Find the nails and countersink them below the surface. They will rip the sandpaper off the machine.
Pull out staples with pliers or a staple remover. Be careful not to dent the wood..
There are a few ways to check for nails and staples before sanding a floor:
- Start with good lighting and scan the floor carefully.
- Look for any raised or shiny spots that might indicate nails or staples.
- If the floor has old carpet tack strips or staples from underlayment, focus on those areas.
- Lightly run your hand over the floor (with gloves on) to feel for protrusions.
- A putty knife or a paint scraper dragged across the surface can catch on raised staples and nail heads.
- Use a Magnet. A strong magnet on a string or attached to a stick can help find hidden nails just below the surface. This works well if some nails have been covered with putty or are slightly recessed. Small pinpointer detectors work well for detailed checks.
- Flashlight at an Angle. Hold a flashlight low to the floor to create shadows highlighting any raised nails or staples.
- Fill gaps or cracks with a wood filler suitable for your floor type. Older floors may require other techniques, which I find more appropriate and aesthetically pleasing.
Sanding The Floor
Try to Use the right techniques to minimize mistakes, because they will get accentuated when you put the finish on.
The Sequence for Sandpaper
- Begin with coarse-grit sandpaper (36-40 grit) to remove the existing finish.
- To smooth the surface, proceed to medium-grit (60-80 grit) and then fine-grit (100-120 grit) sandpaper.
- Pay attention to where you changed from the drum to the edge sander. The different machines may leave a little difference in colour/texture. Blend by hand with sandpaper.
- You might have to use a draw scraper for the bit right in the corner.
Sanding Technique:
- Use a drum sander with a dust bag for the main floor area and an edge sander for corners and edges.
- Always sand in the direction of the wood grain to prevent scratches.
- Keep the sander flat on the floor. You don’t want to create a low spot by digging the sander in.
- Let the sander do the work. Don’t lean on it.
- Just take off the finish. Don’t overdo the sanding. Remember that you’re only sanding off the finish coats, not lowering the floor. Imagine how thick 3-5 coats of varnish are and keep that image in your head. It’s easy to see if patches have been left behind. Sometimes, I hand sand to remove these, I don’t want to go back over them again
- Don’t use the drum sander near the wall. It will damage it. This area is a job for the edge sander.
Dust Removal:
- Thoroughly vacuum the floor and surrounding areas to eliminate dust.
- Wipe the floor with a damp or tack cloth to ensure it’s clean before applying a new finish.
Wooden Floor Redo – Additional Tips:
A. Environmental
- Use a vacuum-equipped sander to minimize airborne dust.
- Collect all sanding dust in sealed bags (preferably biodegradable ones).
- Store your used rags and brushes in a metal container if you used yoil-based finishes, as they can spontaneously combust.
B. Disposal Based on Finish Type
- Toxic or Oil-Based Finish Dust → Treat as hazardous waste and take it to a local hazardous waste facility.
- Non-toxic, Water-Based Finish Dust → Can be bagged and disposed of in regular trash (but avoid inhalation).
- •Wood Chips & Dust from Untreated Wood → Can sometimes be composted or used as mulch (check with your local composting facility).
C. Rags, Brushes & Other Waste
Oily Rags – Store them in a sealed metal container with water before disposal to prevent fire risk.
Used Brushes & Rollers – If they’re coated with water-based finishes, they can be washed and reused or disposed of in the normal trash. If the coating is an oil-based finish, take them to a hazardous waste drop-off.
D. Safety Considerations
Make sure you have proper ventilation when sanding, especially in enclosed spaces. Be mindful of lead-based paints in older homes; consult a professional for safe removal.
Voila! – You’re ready to protect and decorate.
