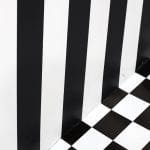
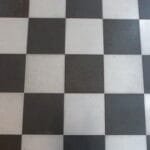
Painting Perfect Stripes and Linear Patterns

Painting perfect stripes or linear patterns on a floor or wall requires careful preparation and attention to detail. Here’s a step-by-step guide to ensure your lines are crisp and clean:
Materials Needed for Painting Stripes and Linear Patterns:
- Painter’s tape (use high-quality tape for clean edges)
- Measuring tape or ruler
- Pencil and level (or chalk line)
- Paint (in the desired colors)
- Roller and small brush
- Paint tray
- Drop cloth
- Sandpaper (if needed for surface prep)
- Sealant or topcoat (if painting a floor)
Step-by-Step Guide
1. Prepare the Surface
- Clean the Surface: Start by thoroughly cleaning the surface you’re going to paint (whether it’s a floor or a wall). For floors, sweep and mop to remove dirt, and for walls, wipe off dust and grease.
- Sand if Necessary: If the surface is uneven or glossy (such as wood or concrete floors), lightly sand it to ensure the paint adheres well. After sanding, wipe away dust with a damp cloth.
2. Base Coat (if applicable)
- If you’re painting stripes on an unpainted surface, like raw wood or concrete, or you’re changing the base color, first apply the base coat. Use a roller for large areas and a small brush for edges and corners.
- Let it Dry: Allow the base coat to dry completely, according to the paint’s instructions (typically 24 hours).
3. Measure and Mark Your Stripes
- Decide on the Stripe Width: Determine the width of your stripes (e.g., 6 inches or 12 inches wide). Thicker stripes are easier to paint and offer a bolder look, while thinner stripes require more precision.
- Measure and Mark: Use a measuring tape and pencil to mark where the stripes will be on the surface. Start from one edge and make small marks at regular intervals (e.g., every 12 inches if your stripes are 12 inches wide).
- Use a Level or Chalk Line: To ensure straight, even lines, use a level or a chalk line (for floors) to connect the pencil marks. This helps you map out perfectly straight lines across the surface.
4. Apply Painter’s Tape
- Tape the Lines: Apply painter’s tape along the pencil lines you’ve marked, being very precise to ensure your lines stay straight.
- Press the Tape Down Firmly: To prevent paint from bleeding under the tape, press it down firmly along the edges, especially on textured surfaces.
- Mark the Painting Area: If you’re alternating colors (e.g., white and gray stripes), it can help to lightly label each section with a pencil (e.g., “paint here”) to avoid painting the wrong section.
5. Seal the Tape Edges (Optional but Highly Recommended)
- Sealing with Base Color: To ensure the cleanest lines possible, paint a light coat of the base color over the edge of the tape. This seals the tape and prevents the new stripe color from bleeding under it.
- Let this coat dry before proceeding with the stripe color.
6. Paint the Stripes
- Use a Roller or Brush: Use a small roller or brush to apply the stripe color between the taped areas. A roller works well for large surfaces, while a brush is best for edges and corners.
- Multiple Coats: Apply one or two coats depending on the paint’s coverage, allowing each coat to dry in between.
- Don’t Overload the Roller: Be careful not to overload the roller or brush with paint, as excess paint can cause drips and seep under the tape.
7. Remove the Tape
- Timing is Key: Remove the painter’s tape while the paint is still slightly wet. This helps avoid peeling the dried paint along with the tape.
- Peel at an Angle: Carefully pull the tape off at a 45-degree angle to avoid damaging the fresh paint.
8. Fix Any Imperfections
- Touch Ups: If any paint has bled under the tape or the lines aren’t as crisp as you’d like, use a small brush to touch up the edges with either the stripe color or the base color.
Pro Tips for Painting Stripes and Linear Patterns
- High-Quality Painter’s Tape: Invest in good painter’s tape designed for crisp lines. FrogTape or blue painter’s tape are popular choices that provide clean edges.
- Pre-Paint the Tape Edges: Sealing the tape edges with the base coat color (or clear paint) is a foolproof method to prevent bleeding and ensure sharp lines.
- Plan the Layout: If painting alternating stripes, ensure the starting point works out evenly. For example, if you’re doing vertical stripes on a wall, start in a corner and measure outwards. If you’re doing horizontal stripes, measure from top to bottom.
- Watch Drying Times: Don’t rush the process. Allow each coat of paint to dry completely before moving on to the next step, especially when working with multiple colors.
- Texture Considerations: If the surface has texture (e.g., textured walls or wood grain), take extra care when applying and pressing down the tape to prevent paint from bleeding into the grooves.
- Finish with a Sealant (for Floors): If you’re painting a floor, add a final topcoat of polyurethane or clear sealant to protect the painted stripes and increase durability, especially in high-traffic areas.
Ideas for Linear Patterns


- Wide Horizontal Stripes: Ideal for making a room feel wider and larger. Works well for walls and floors.
- Vertical Stripes: These elongate a room and are particularly good for small spaces.
- Chevron or Herringbone: For a more dynamic look, use painter’s tape to create angled lines in a chevron or herringbone pattern.
- Checkerboard: Create a grid pattern with alternating color blocks for a classic look, perfect for floors.
- Pinstripes: Thin stripes between larger stripes can add a touch of elegance and complexity to the design.
Here’s to perfect, painted lines and perfect, professional-looking linear patterns on your floor, walls, or furniture.
